
How to Do Ridge Tile Replacement is a practical, step-by-step guide to inspect, remove, and replace ridge tiles—whether you’re dealing with traditional mortar bedding or a modern dry ridge system. It also covers safety, typical costs, and advice on when to call a roofer. This consolidation preserves the strongest, most actionable content from two existing resources while sharpening clarity and usefulness for DIYers and professionals alike. White Mountains Arizona cabin guide offers contextual lodging considerations that can inform roof-access planning for remote properties, which complements this ridge-tile guide when planning roof-work in challenging sites.
| Stage | What To Do | Typical Time / Cost (UK) |
|---|---|---|
| Spot repairs | Replace 1–3 cracked or loose ridge tiles; reseat tiles if necessary; check for damaged mortar at joints. | 1–3 hours; £120–£300 (no scaffolding) |
| Full ridge re-bed or repoint | Re-bed ridge tiles with mortar or repoint joints; assess top battens and underlay; plan for access and waste removal. | 1–3 days; £400–£1,500+ |
| Dry ridge system installation | Switch to a mechanically fixed, ventilated dry ridge kit; install clips/rail, ventilation, and end caps as specified by the kit. | 1–2 days; £600–£1,500+ (kit + labour; scaffolding extra) |
When To Replace Ridge Tiles
Replace ridge tiles when you notice cracked tiles, loose or missing pieces, failing mortar (crumbly pointing), persistent leaks near the ridge, visible movement along the ridge, or rotten top battens under the ridge. Small tiles that are loose can sometimes be reseated, but recurring problems or failing mortar typically signal a broader repair or a move to a dry ridge system for long-term reliability. For broader cost guidance and budgeting context, you can consult our bungalow-loft conversion costs resource for related planning considerations.
Safety And Access Requirements
Roof work carries fall risks and tool hazards. Use scaffolding or a secure tower where possible; for short, low roofs, an edge-protection system or properly rated harness and anchor may suffice. Wear non-slip boots, gloves, eye protection, and a hard hat. In the UK, follow industry best practices and local regulations; in other regions, consult local safety standards. If you’re uncomfortable with height work or the roof requires full scaffolding, hire a qualified roofer. If you’re planning a loft-access upgrade or related roof-work on a bungalow, review related guidance in our loft-conversion planning articles for alignment with building-assembly considerations.
Inspecting The Ridge Before Replacement
- Look for cracked, broken, or missing ridge tiles and mortar that’s powdered or missing.
- Check for movement along the ridge—gaps between tiles or tiles that rock when nudged.
- Lift a ridge tile safely to inspect the top battens, underlay, and any ventilation.
- Note the ridge tile profile and dimensions so replacements or a dry ridge kit match.
Tools, Materials, And Options For Ridge Tile Replacement
Common materials and choices include:
- Replacement ridge tiles: clay, concrete, slate-compatible ridge tiles, or reclaimed/decorative ridge tiles to match.
- Fixing systems: traditional lime/cement mortar bedding and pointing, or mechanical dry ridge kits (vented or non-vented) with clips/screws and foam/ventilation.
- Mortar mix (if re-bedding): pre-blended roof mortar or lime-based mortar where appropriate.
- Dry ridge kit components: vented roll, clips or screws, foam fillers, end caps per manufacturer instructions (BS 5534 guidance often referenced for UK work).
- Safety equipment: scaffolding or roof anchors, ladder standoff, harness, PPE.
Step-By-Step: How To Do Ridge Tile Replacement (Traditional Mortar Bedding)
- Set up safe access (scaffold or secure ladder) and PPE.
- Carefully remove the damaged ridge tiles from the top outward; save any undamaged tiles for reuse.
- Clear loose mortar and debris; inspect the top batten and underlay for rot or failure and replace deteriorated timber.
- Prepare a fresh mortar bed following product instructions; apply evenly to the ridge bed so tiles sit true and pitched correctly.
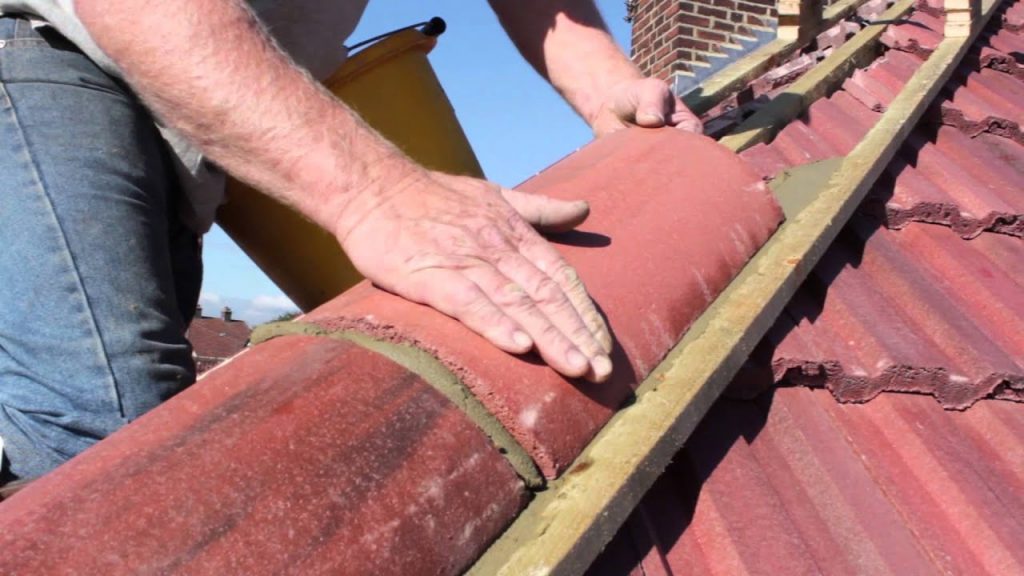
- Bed ridge tiles one by one, pressing into mortar and aligning with adjacent tiles so end overlaps match.
- Point joints neatly with mortar, concave where appropriate to shed water, and tool for a clean finish.
- Allow mortar to cure per manufacturer guidance and protect new pointing from heavy rain for 24–48 hours when possible.
Step-By-Step: How To Do Ridge Tile Replacement (Dry Ridge System)
Dry ridge systems are recommended where mortar fails frequently or where mechanical fixing and ventilation are required. They’re also aligned with UK guidance in many situations.
- Verify the dry ridge kit matches your tile profile and roof pitch; review the instruction sheet for clip spacing, batten overhang, and ventilation requirements.
- Remove existing ridge tiles and clear old mortar down to the ridge batten; replace damaged top battens as needed.
- Fit ventilated ridge roll or foam ventilation strip if provided.
- Attach mechanical clips or fixing rail to the ridge batten as specified, typically every 300–400 mm.
- Fit ridge tiles over the clips/rail and secure with supplied screws or clips; install end caps at hips and ends per kit details.
- Check alignment, mechanical tightness, and ventilation continuity; no mortar pointing is required with a complete dry ridge install.
Repointing Ridge Tiles: When And How Much
Repointing involves removing failing mortar and re-applying fresh mortar to ridge joints. Spot repairs are cheaper; full-length repointing or re-bedding increases labour and cost and may require scaffolding. UK costs for repointing-only jobs typically range from a few hundred to a low-thousand pounds depending on ridge length and access. If mortar fails repeatedly, consider a dry ridge system for long-term reliability.
Matching Tiles And Choosing The Right Replacement
Match the ridge tile profile, material (clay, concrete, slate), and color to the existing roof when aesthetics matter. If exact reclaimed tiles aren’t available, choose a close profile and use complementary pointing or a kit designed for the tile shape. For slate roofs, use slate-specific ridge solutions or specially shaped ridge tiles to suit the thin profile. Readers planning bungalow loft conversions should consider how roof-geometry decisions affect long-term daylight and insulation performance, as explored in our related loft-conversion cost articles.
Ventilation And Why Vented Ridge Tiles Matter
Ventilation is a modern best practice to allow roof space air exchange and reduce condensation risk. Dry ridge kits typically include vented components while maintaining airflow and limiting insect ingress. If your roof already has long vents or exhausts, coordinate ridge ventilation to preserve the roof’s overall ventilation strategy. For broader context on energy efficiency in roof renovations, see our bungalow loft-conversion resources.
Costs: What To Budget For
Costs vary by country, roof height, access (scaffolding), roof complexity, and whether you choose mortar or a dry ridge conversion. Indicative UK ranges:
- Spot replacement of 1–3 ridge tiles: £120–£300 (no scaffolding).
- Replacements plus repointing: a few hundred to £1,000 depending on length and access.
- Full re-bedding and repointing: £400–£1,500+.
- Dry ridge system installation (kit + labour): £600–£1,500+; scaffolding often extra.
Always obtain multiple written quotes and confirm whether scaffold, waste removal, and guarantees are included. For a broader budgeting frame on related home-improvement projects, see our bungalow loft-conversion cost guide for linked considerations.
Common Problems, Mistakes, And How To Avoid Them
- Failing to inspect and replace rotten top battens—re-bedding over rotten timber leads to early failure.
- Poor mortar mixing or pointing in wet weather—protect fresh mortar and follow correct mix ratios.
- Using incompatible ridge tiles or forcing a profile mismatch—measure dimensions and pitch, or choose a compatible dry ridge kit.
- Ignoring ventilation—blocking airflow accelerates condensation and shortens roof lifespan.
- Skimping on safety—professional help is prudent when access requires scaffolding or roof steepness is high.
When To Call A Professional Roofer
Call a pro if scaffolding is needed, more than a few tiles require replacement, top battens or underlay appear damaged, or you prefer a dry ridge conversion. Choose a roofer who provides written quotes, checks BS 5534 compliance (UK) if applicable, offers workmanship guarantees, and carries appropriate insurance. For readers exploring cost-aware upgrades, our related bungalow loft-conversion article can provide additional context on planning and budgeting for structural changes.
Quick Checklist For A DIY Ridge Tile Replacement
- Measure ridge length and tile profile; plan matching replacements.
- Decide between mortar re-bedding vs. dry ridge conversion.
- Arrange safe access: scaffolding or certified harness/anchor.
- Stock tools: hammer, bolster chisel, trowel, mortar board, spirit level, drill for fixings.
- Replace rotten battens or underlay before re-bedding or dry fixing.
- Protect new mortar from rain for 24–48 hours.
- Document work with photos for warranties or insurance claims.
Frequently Asked Practical Questions
How long does ridge pointing cure?
Typically 24–48 hours in good weather for initial set; full strength may take longer. Protect fresh mortar from heavy rain and frost; follow manufacturer guidance.
Is a dry ridge system better than mortar?
Dry ridges avoid mortar weathering and often provide ventilation; they’re mechanically fixed and durable, though compatibility and cost vary. For long-term durability, many projects favor a dry ridge approach.
How much does replacing 3 ridge tiles cost?
Guidance commonly places replacing three ridge tiles around £120–£300 depending on access and material; obtain local quotes for accuracy.
What To Do Next
Carefully inspect the ridge to determine if the repair is a small spot job or a larger rebedding/dry ridge conversion. Gather at least three written quotes listing scaffold, materials, labour, and guarantees. If you plan DIY, secure proper access and follow manufacturer or BS 5534 guidance for mechanical fixing and ventilation where applicable. For broader context on related building and renovation topics, see our linked bungalow loft-conversion resources.
Have you tackled ridge tile replacement recently? Share your experiences, tips, or questions in the comments to help others navigate materials, costs, and safety considerations more confidently. For readers planning toolkits, consider Ridge tile repair tools for a curated set of essential instruments: Ridge tile repair tools.
Location-relevant internal reads you may find valuable as you plan and execute ridge work include:
- Bungalow Loft Conversion Costs Explained for budgeting and planning context.
- White Mountains Arizona Cabin Getaway Guide for site-access considerations in remote roof-work scenarios.
- Wentworth Miller Net Worth And Career Success Explained for a broad editorial example of internal linking about public figures and projects.


Repairing Ridges Tiles!
Replacing ridge tiles can seem like a daunting task, but with the right tools, a bit of patience, and a solid plan, you can easily tackle this project on your own. Remember to take your time to ensure that every tile is positioned correctly and securely, as this will prevent future leaks and protect your roof for years to come. Plus, it's a great way to add value and curb appeal to your home!
Stay Connected for More Tips!
As you embark on your home improvement journey, don’t forget to share your experiences and learnings along the way! I love hearing from others who are taking on similar projects, and it's a fantastic way to stay motivated. For more inspiration and ideas, feel free to follow us on Pinterest where we share plenty of tips for all your DIY needs. Happy tiling!
