Understanding how to use a basin wrench is crucial for anyone tackling DIY plumbing tasks or dealing with faucet installations and repairs. Designed to access hard-to-reach areas beneath sinks, this specialty tool features a self-adjusting gripping head and a long handle, making it ideal for tightening and removing faucet mounting nuts that standard tools can't easily handle. Both professional plumbers and handy homeowners rely on the basin wrench to efficiently complete tasks in tight spaces where precision and ease of use are paramount.
| Feature | Function | Benefit |
|---|---|---|
| Self-adjusting Gripping Head | Tightens onto faucet mounting nuts | Ensures a secure grip in constrained spaces |
| Long Handle | Reaches behind sinks | Accesses areas that are hard to reach with standard tools |
| Swiveling Head | Pivots 180 degrees | Provides flexible positioning for different angles |
| Cost | Approximately $10 to $20 | Affordable for both DIY enthusiasts and professionals |
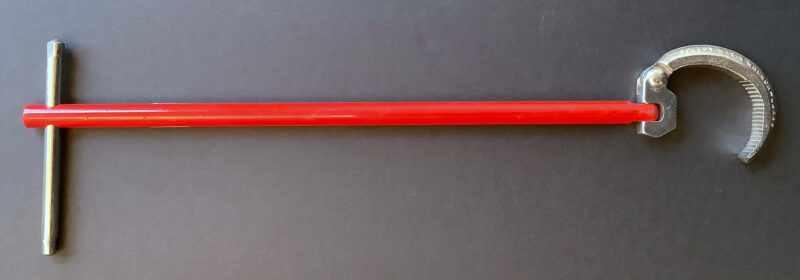
Imagine trying to tighten a faucet nut in a cramped space with an ordinary wrench—frustrating, right? A basin wrench is specifically designed to tackle these tight spots, making it an indispensable tool for any DIY enthusiast or professional plumber. Its unique design allows you to reach behind sinks effortlessly, ensuring that faucet installations and repairs are smooth and hassle-free.
When selecting a basin wrench, certain features can significantly impact its performance and ease of use:

Using a basin wrench doesn't have to be complicated. Here's a simple guide to help you get started:

To ensure your basin wrench remains in top condition:
Absolutely! While a basin wrench may seem like a specialized tool, its ability to efficiently handle faucet-related tasks makes it a valuable addition to your toolkit. Whether you're a homeowner looking to tackle plumbing projects or a professional needing reliable equipment, investing in a quality basin wrench can save you time and reduce the frustration of working in tight spaces.
RIDGID-31180-Telescoping-10-inch-17-inch/dp/B0009W77E6 is an excellent example of a durable and efficient tool for both professional and home use. Have you ever struggled with a faucet installation or repair? Share your experiences below or let us know how a basin wrench has made your plumbing projects easier!
For more insightful content and recent articles on tools and home repairs, check out our blog to stay updated on the latest tips and guides!
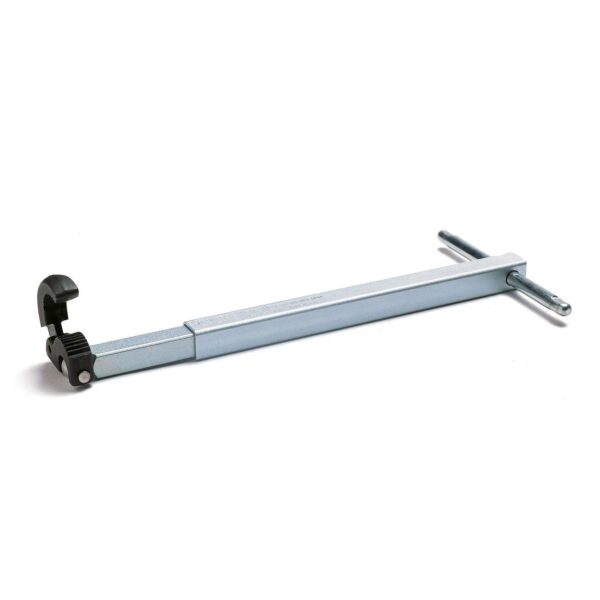
The RIDGID 31180 Model 1019 Telescoping Basin Wrench is a versatile tool designed for plumbing professionals and DIY enthusiasts. Adjustable from 10 inches to 17 inches, this durable wrench efficiently tackles hard-to-reach nuts and fixtures beneath sinks. Its telescoping design ensures a secure grip in tight spaces, while the pivoting head allows for precise operation. With RIDGID's reputation for quality, this basin wrench is a must-have for simplifying plumbing tasks.
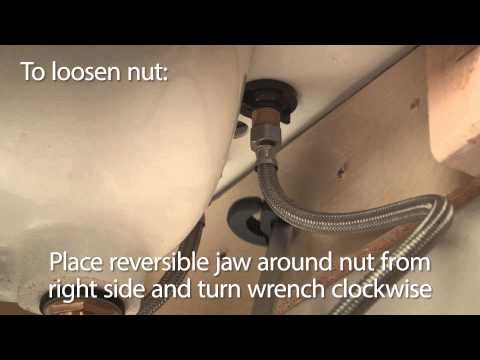
Understanding how to use a basin wrench is crucial for anyone tackling DIY plumbing tasks or dealing with faucet installations and repairs. Designed to access hard-to-reach areas beneath sinks, this specialty tool features a self-adjusting gripping head. To see it in action, watch BrassCraft's video on using their basin wrench to remove or tighten faucet or toilet connector nuts.
To tackle a stubborn faucet nut in a tight space, grab a basin wrench. First, position its adjustable jaw around the nut so it fits snugly. Then, turn the long handle counterclockwise to loosen the nut. If the nut won’t budge, try applying a bit of penetrating oil and let it soak for a few minutes before giving it another turn.
Generally, you’ll rotate most sink nuts counterclockwise to loosen them. If the nut still refuses to move, briefly apply heat from a hair dryer to expand the metal. You can also tap it gently with a hammer to help break any corrosion. If mineral deposits are the culprit, soak the nut in white vinegar and scrub away residue with a wire brush.
Understanding how to use a basin wrench can make all the difference in your DIY plumbing projects. With a bit of practice, you'll be able to handle those tricky faucet repairs and installations like a pro, ensuring your sinks look and function perfectly.
If you found this guide helpful and want to discover more handy tips and tricks, be sure to follow us on Instagram. We're always sharing new ideas to help you tackle your next project with confidence!


Immerse yourself in architecture’s most boundary-pushing ideas—where innovative home improvements meet visionary urban developments. Discover new building techniques, materials, and creative concepts that are redefining how we shape our spaces on a global scale.


