
Artex ceilings can be safely updated by choosing a tested, deliberate path—either skim-coating, overboarding, or removal—only after confirming whether asbestos is present. The central decision hinges on safety, cost, and the desired texture: testing first and then selecting a method yields the most predictable outcome and preserves value in the space.
How to Apply Artex Ceilings is a practical guide to choosing the right route for textured ceilings—from testing for asbestos and deciding between skim-coating, overboarding, or removal, to recreating classic Artex patterns like stipple or swirl. This consolidation combines practical steps, safety considerations, and cost guidance to help you plan and execute Artex-related work with confidence while preserving valuable content from both original sources.
| Finish Option | When To Use | Typical Cost/Time Considerations |
|---|---|---|
| Test & Leave (no disturbance) | Suspected asbestos or texture you want to keep | Low cost — asbestos test ~£50–£150; no major works |
| Skim Over Artex | Light stipple patterns; want a smooth ceiling without full strip-out | Moderate cost — 1–2 days for typical room; trade plasterer rates apply |
| Overboard With Plasterboard | Deep texture, damaged Artex, or faster minimal-dust option | Moderate to high; additional depth and adjustments for lights |
| Removal (Licensed if Asbestos) | Artex is asbestos-containing or you want original surface gone | High if licensed removal needed; licensed contractor required for asbestos |
Safety First: Assessing Asbestos Risk
Before any disturbance, confirm whether asbestos may be present. Artex and similar textured coatings installed from the 1960s through the 1980s can contain chrysotile asbestos. The only reliable method to know is a laboratory test conducted on a sample taken by an accredited surveyor. If asbestos is suspected or confirmed, do not attempt removal—engage a licensed asbestos contractor. If the test is negative, you can proceed with DIY or professional finishes using standard dust controls and PPE. For formal guidance, see Asbestos in Your Home – South Carolina Department of Environmental Services. If you want a quick, consumer-level check, consider an asbestos test kit to decide whether professional testing is warranted before disturbing any textured surface.
Four Main Routes After Safety Check
After confirming safety, you have four practical routes for Artex ceilings:
- Leave and repair small damaged areas (patching).
- Skim-coat over the existing texture for a smooth finish.
- Overboard with plasterboard for a quick, dust-limited solution.
- Remove the Artex completely—only by licensed contractors if asbestos is present.
Preparation and Testing Steps
Prepare the work area and confirm safety before starting any technique:
- Check the build date and history; if pre-1980s, assume some risk until tested.
- Arrange an accredited asbestos test; a lab-analyzed small core sample is standard.
- Turn off power, remove fixtures, and protect the room with dust sheets and barriers as needed.
- Ventilate the space and plan for containment to minimize dust spread.
Repairing Small Areas: Patching
If you’re repairing rather than resurfacing, patching can be quick and cost-effective:
- Remove loose or flaking Artex with hand tools, keeping dust to a minimum (lightly wetting helps, but avoid soaking).
- Fill depressions with strong filler or bonding plaster; blend textured patches to match surrounding areas.
- Lightly sand after drying, prime the patch, and paint with a ceiling paint formulated for textured surfaces.
Skim-Coating Over Artex: Step-By-Step
Skimming can transform a textured ceiling into a smooth finish when asbestos is not present. Key steps:
- Prepare: Remove fixtures, protect walls and floors, ventilate, and wear a suitable dust mask (P2/FFP2 for non-asbestos work).
- Key the surface: Lightly sand or mechanical keying to improve adhesion; apply a bonding primer if recommended by plaster manufacturers.
- Scratch coat: Apply a thin base layer (1–2 mm) to evenly out hollows.
- Finish coat: Apply the finishing skim (1–2 mm) with a wide trowel for a flat surface.
- Drying and priming: Allow full drying, then lightly sand and seal with an acrylic primer before painting.
Overboarding: Plasterboard for Deep Texture or Damage
Overboarding is a dust-minimising option for deep textures or damaged ceilings, especially when leaving the original surface undisturbed isn’t advised by a specialist:
- Attach 12.5 mm (or 15 mm if needed) plasterboard directly to joists or battens; stagger joints and screw firmly.
- Recess or adapt for lights and create access panels where required.
- Joint tape, skim, sand, prime, and paint; account for additional depth in lighting and cornice arrangements.
Removing Artex: Safe Methods and Cost Considerations
Full removal yields a flat substrate but is disruptive and regulated if asbestos is present. Consider:
- If asbestos is present: hire a licensed asbestos removal company; containment, negative-pressure extraction, and disposal add to cost and complexity.
- If asbestos is not present: removal can be done by scraping or steaming, followed by plaster or plasterboard repairs; expect substantial dust and potential repair work beneath.
- Cost factors include room size, pattern depth, ceiling condition, and whether licensed asbestos removal is required.
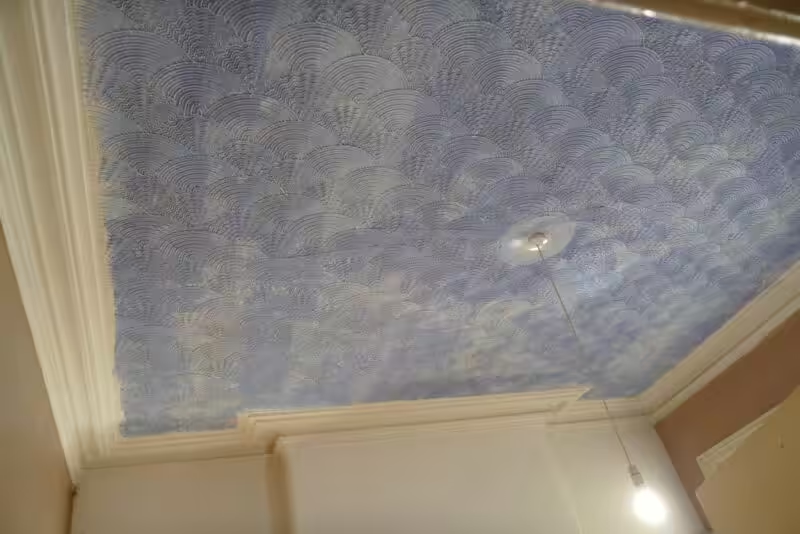
Texture Recreation: Stipple, Swirl, and Other Patterns
If you want Artex-style textures instead of removal, follow these tips to recreate patterns:
- Use pre-mixed Artex compounds or textured coatings matched to the design type (stipple, swirl, etc.).
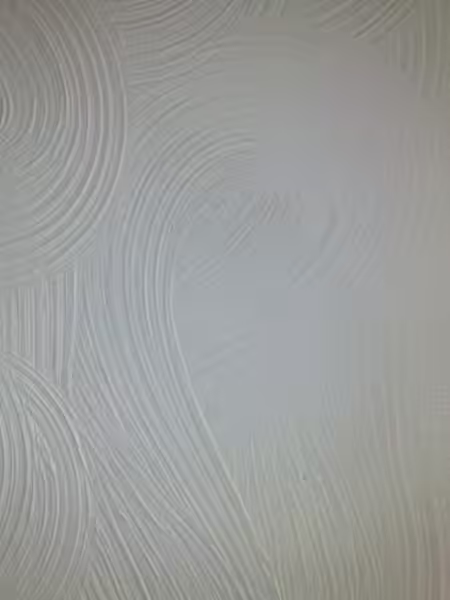
- Practice on a board first; stippling uses rhythmic brush or trowel work, while swirls rely on a rounded brush and circular motions.
- Maintain consistent thickness to match the depth and pattern size for a cohesive blend; experienced applicators yield the best match.
Painting Over Artex: Preparation and Product Choices
Whether skimmed, overboarded, or left textured, these painting strategies help achieve a durable finish:
- Prime with an appropriate sealer or acrylic primer to reduce absorbency and even sheen.
- Choose a high-opacity ceiling paint or a thick-matte emulsion designed for ceilings; thicker paints can help even out texture without erasing pattern definition.
- Use a long-pile roller suitable for textures for even coverage.
Artex and Asbestos: Common Questions
Common concerns include:
Q: How likely is asbestos in an Artex ceiling? A: Textures installed before the mid-1980s are more likely to contain asbestos. The only safe determination is lab testing. Q: Is DIY exposure risky? A: Brief exposures are unlikely to cause disease, but risk depends on fibre type and cumulative exposure. If worried after disturbing Artex, consult a doctor and consider asbestos testing. Q: What’s the cheapest way to remove Artex? A: Overboarding with plasterboard is often the cheapest and fastest option, but it increases ceiling depth and may affect wiring or light placement.
Practical Checklist For A Typical Skim Job
- Confirm asbestos test results (negative) or licensed removal completion.
- Turn off electricity, remove fittings, and isolate the room.
- Protect floors and furnishings; seal doorways with dust sheets.
- Key the Artex surface and apply recommended bonding primer if required.
- Apply base coat and finishing skim in thin layers; let each coat dry fully.
- Lightly sand, prime, and paint with ceiling-grade paint.
- Re-fit lighting and restore the room.
Finding Trades, Estimates, And What To Expect From Contractors
Searching for “artex plasterer near me” or “artex removal near me” will yield local options with varying costs. For non-asbestos skim work, a skilled plasterer typically completes a standard living room ceiling in 1–2 days (plus drying). If asbestos is involved, licensed removal requires more time, air monitoring, and higher costs; quotes should specify containment, clearance certificates, and disposal. For broader architectural guidance and context, explore Architecture Adrenaline’s architecture resources and rankings.
Common Mistakes And How To Avoid Them
Avoid these pitfalls to keep the project on track:
- Assuming no asbestos just because the texture looks modern—older properties should be tested.
- Applying an excessively thick skim coat in one go—this can crack or delaminate.
- Neglecting lighting and wiring changes when overboarding—this may incur additional costs later.
- DIY asbestos removal without authorization—this is illegal and dangerous.
Quick Reference: When To Call A Specialist
- Positive or suspected asbestos test result — call a licensed asbestos removal contractor.
- Deep or widespread Artex damage suggesting structural concerns — consult a plasterer or surveyor.
- Want to reproduce an ornate pattern across a large space — hire a tradesperson experienced in Artex texturing.
We’d love to hear from you—have you dealt with Artex in your home? Share your experiences, questions, or tips in the comments below, and tell us which route you chose and how it worked out for your space. For broader context on architecture topics and professional resources, visit our Architecture category and the Architecture Rankings page.
How to Cover Your Artex Ceilings Easily? #homeimprovement #construction #ceiling #renovation:
Finishing up your Artex ceiling can truly transform your space, adding texture, character, and a touch of personal flair. Whether you're new to DIY or a seasoned pro, applying Artex doesn't have to be daunting; it’s about taking your time, getting the right materials, and letting your creativity flourish. Remember to prep your area well and work in manageable sections. Soon enough, you’ll be admiring your handiwork and the cozy atmosphere it brings to your home!
Stay Connected for More Inspiration!
I hope you found these tips helpful and feel excited to tackle your Artex ceiling project! If you’re looking for more inspiration or want to share your progress, don’t hesitate to follow along with us on social media. Connect with our community on Instagram for fresh ideas and updates. Happy decorating, and remember to enjoy the process as you make your home truly yours!
