
Repairing a sagging leather couch with non-removable cushions hinges on the furniture’s support structure more than the leather itself. The swift, durable fixes center on a rigid seat platform and addressing the foam and underlying deck from an access point under the sofa. This approach restores height and firmness while keeping the leather intact. For a detailed approach, see the method outlined in the Architecture Adrenaline guide on repairing a sagging leather couch with non-removable cushions.
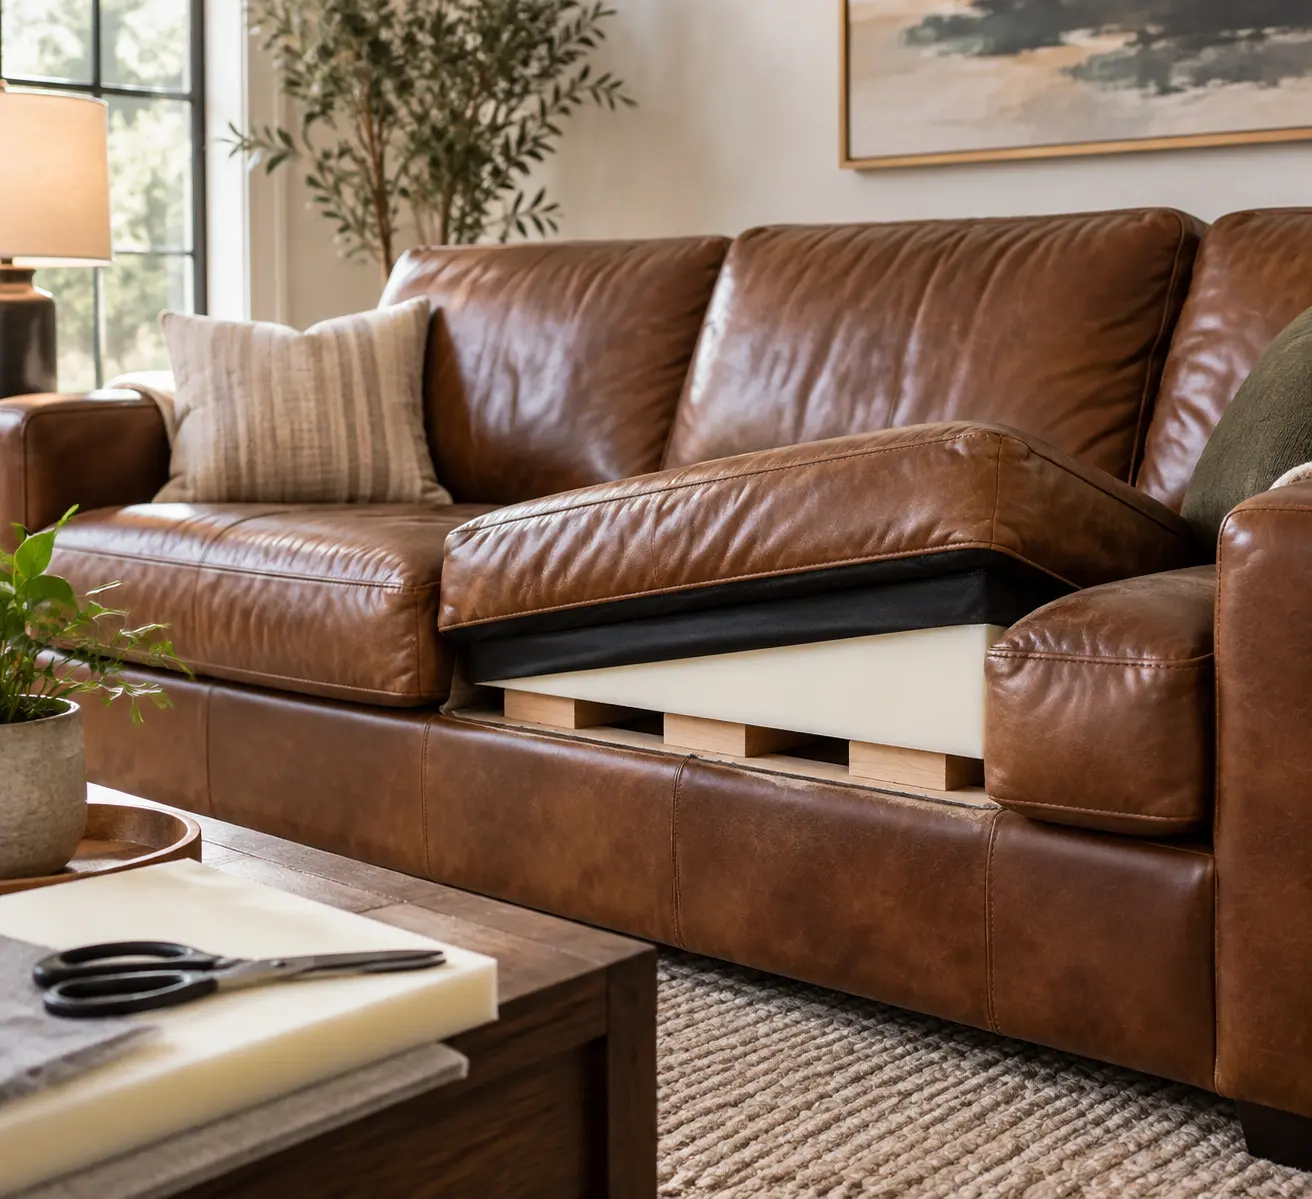
Diagnose: what’s really causing the sag
Before you start, confirm where the failure lies. Sit on the sagging area and press to feel for the soft spot. Check from beneath if accessible: listen for slack springs, and test whether the foam compresses to the frame. Common causes include compressed foam, weakened suspension (springs or webbing), or a flexible seat deck. For context on how professionals assess these issues, refer to related guidance from Architecture Adrenaline.
Understanding the Causes of Sinking Couch Cushions
Sagging cushions are often a result of consistent use, inferior cushion material, or weakened support structures. Fixed cushions exacerbate the difficulty since they don't allow easy access for maintenance. If you've experienced sagging issues with one couch but not another, consider factors like cushion material, frequency of use, and overall quality.
Why a plywood support board helps for non-removable cushions
A rigid plywood insert redistributes load across the frame, reducing concentrated pressure on the foam. When cushions can’t be removed, you can typically slide a board in through a back gap or access panel. The result is immediate improvement with minimal leather disruption. See examples of how similar support strategies are described in Architecture Adrenaline coverage of fixed-cushion solutions.
What you’ll need
- 3/4" plywood or furniture-grade birch cut to the seat footprint
- High-density foam sheets (2"-3" HD foam, 2.8-3.0 lb/ft3) and batting
- Spray adhesive or contact cement rated for foam
- Heavy webbing or replacement sinuous springs if needed
- Metal L-brackets or corner braces for frame reinforcement
- Screwdriver, drill, utility knife or electric carving knife, measuring tape
- Moving blankets to protect leather and gloves for handling adhesives
For stock suggestions and compatible components, see the Architecture Adrenaline product roundups on sofa hardware and upgrade options.
Accessing the seat without removing leather
Non-removable cushions require careful work from the bottom or through seams. Start by exposing the underside: remove a fabric dust cover if present to view the frame and seat deck. If there’s a gap behind the seat, cut a plywood board to fit between the front rail and back frame. Ensure a snug, non-forced fit. This approach mirrors practical steps described in Architecture Adrenaline’s interior repair tutorials.
Installing a plywood support board
Cut the board slightly smaller than the cushion footprint so it stays clear of upholstery seams. A typical 3/4" board works for most sofas. Slide the board under the foam, resting it on the side rails or internal framing. If the board shifts, secure it with screws into the frame rails or apply construction adhesive on top of rails before seating the board. After installation, test for evenness and comfort by sitting down. Architecture Adrenaline’s coverage of similar DIY seat-structure enhancements provides practical context.
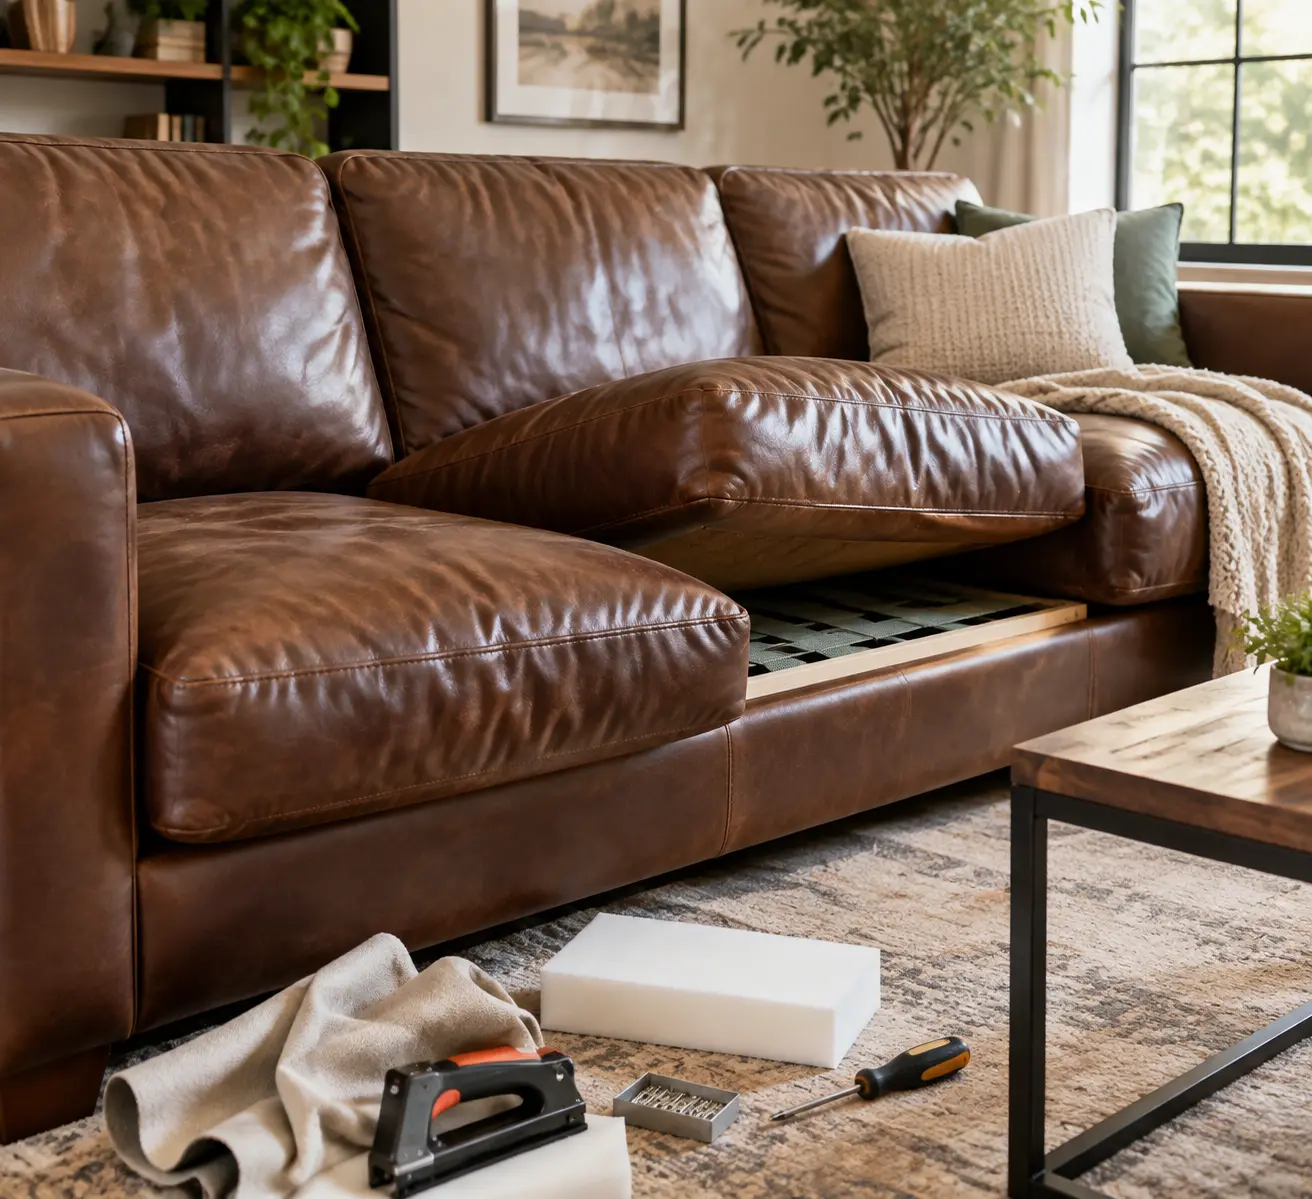
Foam replacement for sagging cushions
If the foam has permanently compressed or degraded, replacing it restores height and support. For non-removable cushions, you have two practical options:
- Access from beneath via the underside after removing the dust cover. Many upholsterers cut a small service flap, replace the old foam, and slide new foam into place. Reattach the lining with staples or fabric glue.
- If underside access isn’t possible, add a high-density foam topper on top of the existing foam by first installing a thin plywood platform, then gluing the topper to the plywood.
When cutting foam, use an electric carving knife or a coarse serrated blade for clean edges. Wrap new foam with batting to smooth corners and prevent leather from showing seams. Consider a high-density foam topper available online.
Reinforcing springs and general suspension
Often the hammock effect comes from the seat suspension. If you find broken S-springs, stretched sinuous springs, or worn webbing, replace or reinforce. Options include retensioning springs, adding heavy-duty elastic webbing, or installing a new sinuous system. If frame joints are loose, reinforce with corner braces and tighten fasteners before finalizing the plywood and foam work. Architecture Adrenaline’s related projects discuss how proper suspension affects long-term comfort.
When to call a professional
Consider a pro upholstery or leather-restoration service if any of the following apply:
- Leather panels are sewn in with no access seams and risk tearing is high.
- The frame is cracked or you need a complex structural repair.
- You require an exact foam density match or a contour that mirrors the original for a high-end piece.
Professional restuffing services can supply HR foam cores, rewrap cushions with proper batting, and reattach leather with a factory finish. The cost is higher, but durability and appearance are typically better preserved. See Architecture Adrenaline’s feature on high-end restorative work for similar guidance.
Trade-offs and expected outcomes
Simple fixes like towels or thin toppers may feel firmer initially but degrade quickly. A plywood platform plus HD foam offers a good balance of cost, durability, and minimal leather work. Full reupholstery is the most enduring but the most expensive. If the leather is sagging or stretched beyond repair, support fixes alone may not restore the look.
Maintenance to prevent future sag
- Rotate seating use for removable cushions; for fixed cushions, alternate siting to distribute wear.
- Condition leather regularly to prevent drying and cracking that can worsen sagging tangentially.
- Avoid direct sun and control humidity to slow foam degradation.
- Check underside fasteners and webbing annually, especially with heavy use.
For ongoing care, Architectural Adrenaline has ran features on leather maintenance and frame checks that complement this guidance.
Costs and timelines at a glance
DIY plywood board plus a foam topper can be a same-day fix under $100 in materials. Foam replacement via underside access is usually a weekend project, typically $75-$250 for foam density and size. Professional restuffing or suspension replacement generally runs $200-$800 or more, depending on sofa size and location. Frame repairs add time and expense.
To see how these timeframes compare with professional outcomes, consult Architecture Adrenaline’s case studies on repairs and restorations.
Quick decision guide
- If the seat deck is solid but foam is compressed, replace foam or add an HD topper.
- If the deck or springs are failing, install a plywood support and repair or replace the suspension.
- If leather seams or panels could be disturbed by the repair, hire a professional to avoid visible damage.
Frequently asked questions
Will a plywood base make the seat too firm? You can tune firmness by pairing plywood with a 1"-2" memory foam topper or a 2" HD foam layer. This creates a balanced feel with some give.
Can I use IKEA foam or mattress foam? Use seating-grade high-density polyurethane foam. Mattress memory foam alone tends to flatten faster under concentrated seating loads. Combine memory foam with HD base foam for best results.
Will this harm the leather? Accessing from the underside avoids cutting leather. Protect visible panels with moving blankets and work carefully around seams.
Final practical recommendations
Start with an underside diagnosis. In most cases, the best value comes from installing a plywood support board, repairing any loose springs or webbing, and replacing or topping foam with a high-density option. Reserve full reupholstery or major frame work for valuable pieces or when you must detach leather to achieve a proper foam replacement.
At-a-glance repair table
| Repair approach | Time | Typical cost range |
|---|---|---|
| Slide-in plywood support board under seat | 1-2 hours | $15-$60 material |
| High-density foam replacement via underside | 3-6 hours | $50-$250 foam + adhesives |
| Replace springs or webbing, reinforce frame | 2-6 hours | $50-$300 parts; more if professional |
| Professional restuffing/reupholstery | Several days | $200-$800+ depending on sofa |
Sagging leather DFS sofa repair
Over time, even the sturdiest couches can suffer from sagging cushions, making them uncomfortable and less appealing. This challenge can be significantly more complex when the couch cushions are fixed and cannot be removed. However, several strategies can help improve the firmness of these cushions without removing them.
Strategies to Fix Sinking Couch Cushions
Inserting New Material
One effective method is to add more support material into the cushion. Here are some detailed strategies:
Using Dacron
Dacron stuffing can be a good option for adding support. Cut a thick piece of Dacron to fit your cushion and insert it through an existing seam or by making a small incision. While this may lead to some bumps and imperfections, it can significantly improve the cushion's firmness.
Additional Padding
A practical and simple solution is to place additional padding or a firm cushion on top of or underneath the existing cushion. Ensure it's securely positioned to avoid slippage.
Maintaining and Prolonging Cushion Life
Regular Maintenance
Regularly flip and rotate the cushions to ensure even wear. This simple habit can prevent certain areas from deteriorating more quickly than others.
Usage Tips
Evenly distribute usage across the couch. Avoid repeatedly sitting in the same spot to ensure a more uniform wear of the cushions.
Protect from Extremes
Protect your couch from extreme humidity and direct sunlight, which can warp the materials and degrade the cushioning over time.
In conclusion, though fixed cushions present a unique set of challenges, with the right approach—whether through DIY methods or professional assistance—you can restore your couch's comfort and longevity. Regular maintenance and thoughtful use will also prolong the life of your furniture, ensuring it remains both functional and attractive for years to come.
Let’s carry the idea forward
The approach outlined keeps the leather intact while restoring support. If the piece has sentimental or monetary value, or if the repair involves complex frame work, engage a professional upholsterer to ensure a clean, durable result. See related Architecture Adrenaline features on fixed-cushion repair projects for additional context.
Internal references for further reading and related topics:
- Repairing a sagging leather couch with non-removable cushions: tips
- Wells leather sofa
- The Floyd sofa
- How to repair a window seat like a pro